Python provides various options for developing graphical user interfaces (GUIs). Most important are listed below.
- Tkinter: Tkinter is the Python interface to the Tk GUI toolkit shipped with Python. We would look this option in this chapter.
- wxPython: This is an open-source Python interface for wxWindows http://wxpython.org.
- JPython: JPython is a Python port for Java which gives Python scripts seamless access to Java class libraries on the local machine http://www.jython.org.
There are many other interfaces available, which you can find them on the net.
Tkinter Programming
Tkinter is the standard GUI library for Python. Python when combined with Tkinter provides a fast and easy way to create GUI applications. Tkinter provides a powerful object-oriented interface to the Tk GUI toolkit.
Creating a GUI application using Tkinter is an easy task. All you need to do is perform the following steps −
- Import the Tkinter module.
- Create the GUI application main window.
- Add one or more of the above-mentioned widgets to the GUI application.
- Enter the main event loop to take action against each event triggered by the user.
Example
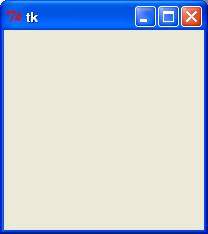
import tkinter
top = tkinter.Tk()
# Code to add widgets will go here...
top.mainloop()
This would create a following window −
Tkinter Widgets
Tkinter provides various controls, such as buttons, labels and text boxes used in a GUI application. These controls are commonly called widgets.
There are currently 15 types of widgets in Tkinter.
Python Tkinter Button
Example
Try the following example yourself −
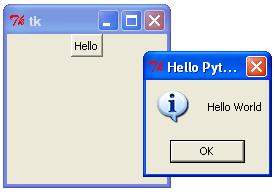
import Tkinter
import tkMessageBox

top = Tkinter.Tk()

def helloCallBack():
   tkMessageBox.showinfo( "Hello Python", "Hello World")

B = Tkinter.Button(top, text ="Hello", command = helloCallBack)

B.pack()
top.mainloop()
When the above code is executed, it produces the following result −
Python Tkinter Canvas
Example
Try the following example yourself −
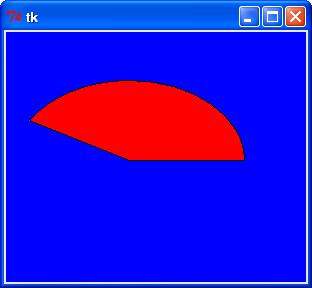
import Tkinter
import tkMessageBox

top = Tkinter.Tk()

C = Tkinter.Canvas(top, bg="blue", height=250, width=300)

coord = 10, 50, 240, 210
arc = C.create_arc(coord, start=0, extent=150, fill="red")

C.pack()
top.mainloop()
When the above code is executed, it produces the following result −
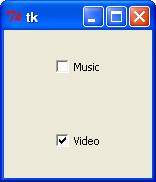
Python Tkinter Checkbutton
Example
Try the following example yourself −
from Tkinter import *
import tkMessageBox
import Tkinter

top = Tkinter.Tk()
CheckVar1 = IntVar()
CheckVar2 = IntVar()
C1 = Checkbutton(top, text = "Music", variable = CheckVar1, \
                 onvalue = 1, offvalue = 0, height=5, \
                 width = 20)
C2 = Checkbutton(top, text = "Video", variable = CheckVar2, \
                 onvalue = 1, offvalue = 0, height=5, \
                 width = 20)
C1.pack()
C2.pack()
top.mainloop()
When the above code is executed, it produces the following result −
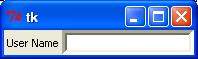
Python Tkinter Entry
Example
Try the following example yourself −
from Tkinter import *

top = Tk()
L1 = Label(top, text="User Name")
L1.pack( side = LEFT)
E1 = Entry(top, bd =5)

E1.pack(side = RIGHT)

top.mainloop()
When the above code is executed, it produces the following result:
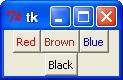
Python Tkinter Frame
Example
Try the following example yourself −
from Tkinter import *

root = Tk()
frame = Frame(root)
frame.pack()

bottomframe = Frame(root)
bottomframe.pack( side = BOTTOM )

redbutton = Button(frame, text="Red", fg="red")
redbutton.pack( side = LEFT)

greenbutton = Button(frame, text="Brown", fg="brown")
greenbutton.pack( side = LEFT )

bluebutton = Button(frame, text="Blue", fg="blue")
bluebutton.pack( side = LEFT )

blackbutton = Button(bottomframe, text="Black", fg="black")
blackbutton.pack( side = BOTTOM)

root.mainloop()
When the above code is executed, it produces the following result −
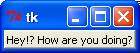
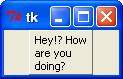
Python Tkinter Label
This widget implements a display box where you can place text or images. The text displayed by this widget can be updated at any time you want.
It is also possible to underline part of the text (like to identify a keyboard shortcut) and span the text across multiple lines.
Syntax
Here is the simple syntax to create this widget −
w = Label ( master, option, ... )
Parameters:
- master: This represents the parent window.
- options: Here is the list of most commonly used options for this widget. These options can be used as key-value pairs separated by commas.
| Option | Description |
|---|---|
| anchor | This options controls where the text is positioned if the widget has more space than the text needs. The default is anchor=CENTER, which centers the text in the available space. |
| bg | The normal background color displayed behind the label and indicator. |
| bitmap | Set this option equal to a bitmap or image object and the label will display that graphic. |
| bd | The size of the border around the indicator. Default is 2 pixels. |
| cursor | If you set this option to a cursor name (arrow, dot etc.), the mouse cursor will change to that pattern when it is over the checkbutton. |
| font | If you are displaying text in this label (with the text or textvariable option, the font option specifies in what font that text will be displayed. |
| fg | If you are displaying text or a bitmap in this label, this option specifies the color of the text. If you are displaying a bitmap, this is the color that will appear at the position of the 1-bits in the bitmap. |
| height | The vertical dimension of the new frame. |
| image | To display a static image in the label widget, set this option to an image object. |
| justify | Specifies how multiple lines of text will be aligned with respect to each other: LEFT for flush left, CENTER for centered (the default), or RIGHT for right-justified. |
| padx | Extra space added to the left and right of the text within the widget. Default is 1. |
| pady | Extra space added above and below the text within the widget. Default is 1. |
| relief | Specifies the appearance of a decorative border around the label. The default is FLAT; for other values. |
| text | To display one or more lines of text in a label widget, set this option to a string containing the text. Internal newlines (“\n”) will force a line break. |
| textvariable | To slave the text displayed in a label widget to a control variable of class StringVar, set this option to that variable. |
| underline | You can display an underline (_) below the nth letter of the text, counting from 0, by setting this option to n. The default is underline=-1, which means no underlining. |
| width | Width of the label in characters (not pixels!). If this option is not set, the label will be sized to fit its contents. |
| wraplength | You can limit the number of characters in each line by setting this option to the desired number. The default value, 0, means that lines will be broken only at newlines. |
Example
Try the following example yourself −
from Tkinter import *

root = Tk()

var = StringVar()
label = Label( root, textvariable=var, relief=RAISED )

var.set("Hey!? How are you doing?")
label.pack()
root.mainloop()
When the above code is executed, it produces the following result −
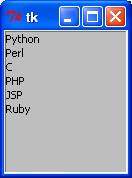
Python Tkinter Listbox
Example
Try the following example yourself −
from Tkinter import *
import tkMessageBox
import Tkinter

top = Tk()

Lb1 = Listbox(top)
Lb1.insert(1, "Python")
Lb1.insert(2, "Perl")
Lb1.insert(3, "C")
Lb1.insert(4, "PHP")
Lb1.insert(5, "JSP")
Lb1.insert(6, "Ruby")

Lb1.pack()
top.mainloop()
When the above code is executed, it produces the following result −
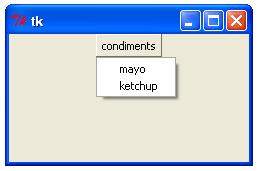
Python Tkinter Menubutton
Example
Try the following example yourself −
from Tkinter import *
import tkMessageBox
import Tkinter

top = Tk()

mb=  Menubutton ( top, text="condiments", relief=RAISED )
mb.grid()
mb.menu  =  Menu ( mb, tearoff = 0 )
mb["menu"]  =  mb.menu

mayoVar  = IntVar()
ketchVar = IntVar()

mb.menu.add_checkbutton ( label="mayo",
                          variable=mayoVar )
mb.menu.add_checkbutton ( label="ketchup",
                          variable=ketchVar )

mb.pack()
top.mainloop()
When the above code is executed, it produces the following result −
Python Tkinter Menu
Example
Try the following example yourself −
from Tkinter import *
def donothing():
   filewin = Toplevel(root)
   button = Button(filewin, text="Do nothing button")
   button.pack()

root = Tk()
menubar = Menu(root)
filemenu = Menu(menubar, tearoff=0)
filemenu.add_command(label="New", command=donothing)
filemenu.add_command(label="Open", command=donothing)
filemenu.add_command(label="Save", command=donothing)
filemenu.add_command(label="Save as...", command=donothing)
filemenu.add_command(label="Close", command=donothing)

filemenu.add_separator()

filemenu.add_command(label="Exit", command=root.quit)
menubar.add_cascade(label="File", menu=filemenu)
editmenu = Menu(menubar, tearoff=0)
editmenu.add_command(label="Undo", command=donothing)

editmenu.add_separator()

editmenu.add_command(label="Cut", command=donothing)
editmenu.add_command(label="Copy", command=donothing)
editmenu.add_command(label="Paste", command=donothing)
editmenu.add_command(label="Delete", command=donothing)
editmenu.add_command(label="Select All", command=donothing)

menubar.add_cascade(label="Edit", menu=editmenu)
helpmenu = Menu(menubar, tearoff=0)
helpmenu.add_command(label="Help Index", command=donothing)
helpmenu.add_command(label="About...", command=donothing)
menubar.add_cascade(label="Help", menu=helpmenu)

root.config(menu=menubar)
root.mainloop()
When the above code is executed, it produces the following result −

Python Tkinter Message
Example
Try the following example yourself −
from Tkinter import *

root = Tk()

var = StringVar()
label = Message( root, textvariable=var, relief=RAISED )

var.set("Hey!? How are you doing?")
label.pack()
root.mainloop()
When the above code is executed, it produces the following result −
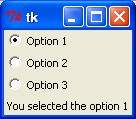
Python Tkinter Radiobutton
Example
Try the following example yourself −
from Tkinter import *

def sel():
   selection = "You selected the option " + str(var.get())
   label.config(text = selection)

root = Tk()
var = IntVar()
R1 = Radiobutton(root, text="Option 1", variable=var, value=1,
                  command=sel)
R1.pack( anchor = W )

R2 = Radiobutton(root, text="Option 2", variable=var, value=2,
                  command=sel)
R2.pack( anchor = W )

R3 = Radiobutton(root, text="Option 3", variable=var, value=3,
                  command=sel)
R3.pack( anchor = W)

label = Label(root)
label.pack()
root.mainloop()
When the above code is executed, it produces the following result −
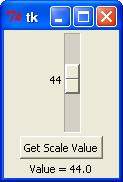
Python Tkinter Scale
Example
Try the following example yourself −
from Tkinter import *

def sel():
   selection = "Value = " + str(var.get())
   label.config(text = selection)

root = Tk()
var = DoubleVar()
scale = Scale( root, variable = var )
scale.pack(anchor=CENTER)

button = Button(root, text="Get Scale Value", command=sel)
button.pack(anchor=CENTER)

label = Label(root)
label.pack()

root.mainloop()
When the above code is executed, it produces the following result −
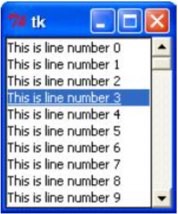
Python Tkinter Scrollbar
Example
Try the following example yourself −
from Tkinter import *

root = Tk()
scrollbar = Scrollbar(root)
scrollbar.pack( side = RIGHT, fill=Y )

mylist = Listbox(root, yscrollcommand = scrollbar.set )
for line in range(100):
   mylist.insert(END, "This is line number " + str(line))

mylist.pack( side = LEFT, fill = BOTH )
scrollbar.config( command = mylist.yview )

mainloop()
When the above code is executed, it produces the following result −
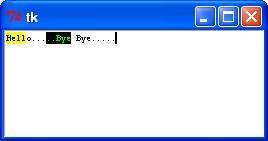
Python Tkinter Text
Example
Try the following example yourself −
from Tkinter import *

def onclick():
   pass

root = Tk()
text = Text(root)
text.insert(INSERT, "Hello.....")
text.insert(END, "Bye Bye.....")
text.pack()

text.tag_add("here", "1.0", "1.4")
text.tag_add("start", "1.8", "1.13")
text.tag_config("here", background="yellow", foreground="blue")
text.tag_config("start", background="black", foreground="green")
root.mainloop()
When the above code is executed, it produces the following result −
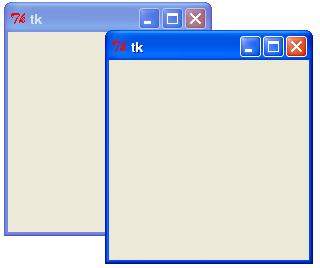
Python Tkinter Toplevel
Example
Try following example yourself −
from Tkinter import *

root = Tk()
top = Toplevel()

top.mainloop()
When the above code is executed, it produces the following result −
Python Tkinter Spinbox
Example
Try the following example yourself −
from Tkinter import *

master = Tk()

w = Spinbox(master, from_=0, to=10)
w.pack()

mainloop()
When the above code is executed, it produces the following result −

Python Tkinter Spinbox
Example
Try the following example yourself −
from Tkinter import *

master = Tk()

w = Spinbox(master, from_=0, to=10)
w.pack()

mainloop()
When the above code is executed, it produces the following result −
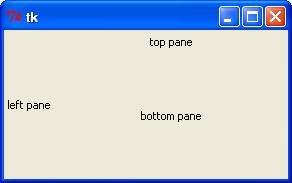
Python Tkinter PanedWindow
Example
Try the following example yourself. Here’s how to create a 3-pane widget −
from Tkinter import *

m1 = PanedWindow()
m1.pack(fill=BOTH, expand=1)

left = Label(m1, text="left pane")
m1.add(left)

m2 = PanedWindow(m1, orient=VERTICAL)
m1.add(m2)

top = Label(m2, text="top pane")
m2.add(top)

bottom = Label(m2, text="bottom pane")
m2.add(bottom)

mainloop()
When the above code is executed, it produces the following result −
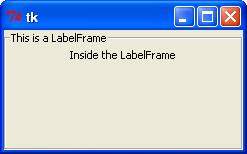
Python Tkinter LabelFrame
Example
Try the following example yourself. Here is how to create a labelframe widget −
from Tkinter import *

root = Tk()

labelframe = LabelFrame(root, text="This is a LabelFrame")
labelframe.pack(fill="both", expand="yes")

left = Label(labelframe, text="Inside the LabelFrame")
left.pack()

root.mainloop()
When the above code is executed, it produces the following result −
Python Tkinter tkMessageBox
Example
Try the following example yourself −
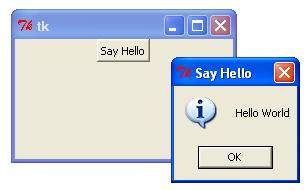
import Tkinter
import tkMessageBox

top = Tkinter.Tk()
def hello():
   tkMessageBox.showinfo("Say Hello", "Hello World")

B1 = Tkinter.Button(top, text = "Say Hello", command = hello)
B1.pack()

top.mainloop()
When the above code is executed, it produces the following result −